
Painting your dolls faces yourself has a lot of benefits. In addition to saving you money (about 10$ per head), you get to really personalize the doll. There's also a sense of pride every time you look at them. :) I hope everyone tries it out. I know it's daunting at first, but once you take the leap and paint your first face, it's nothing but fun!
What you'll need:
Doll heads! (My directions work well for vinyl doll heads.)
A paper plate
A cup of water
A variety of small brushes
Craft paint (I recommend white, red, yellow, blue, and black minimum, but you can get whatever colors you want!)
Paint varnish (usually in the same store as the craft paint, and comes in a bigger bottle)
Cotton swabs (Q-tips)
Rubbing alcohol or non-acetic nail polish remover
Optional:
Eye dropper
Small pillow
Little hair-elastics
1. Set up your workspace on a flat, steady table. This is what my setup looks like.

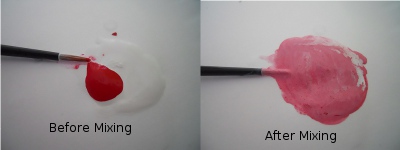
2. Get your white paint ready to paint with. Put a dibble in your paper plate, then drip some water right next to it, with your brush or an eye dropper. Add enough water so the water drop is about the same size as the paint drop. Then stir it until it doesn't looks separated anymore. We do this so the paint will be thinner and not gloppy. Here's what it looks like before mixing with blue paint, so you can see it clearly.

3. With white paint now in your brush, carefully paint on the whites of
your doll's eyes. If they have an eye bump, just cover that. If they
have no eye bump, just paint an eye shape and fill it in. If your
hand's a bit shaky, put the small pillow or a balled up sweatshirt under
your elbow.

4. Once you've done everything you want white, mix a color for the
lips. This can be either beige for no lipstick, or a color for
lipstick. You wanna have something there, because it makes their face
look less like a sculpture. Take your time mixing colors, and remember
to add as much water as paint. With a lighter tone, paint the whole
lips. Then mix in more paint in your color and add a darker line where
the lips separate. To lighten the paint, add more water. To darken it,
let it sit for a few minutes, maybe add more paint. I don't recommend
adding black because black will overcome the paint's color very quickly.
4A. If you'd like to add freckles or scars, now is a good time!

If you don't like something you've added, you can remove it with a Qtip and some non-acetic nail polish remover.

5. Time to paint the irises of the eyes. When you paint the irises, use
very watered down paint and make a C shape with the eye color you
want. To make the color stronger, go over it again the same way you did
for the whites of the eyes.

6. Next, paint in the pupils, by painting little black creacent moons
inside the irises. While you still have the black paint, carefully
outline the top half of the eye and a little bit of the bottom half,
then if you want black eyebrows, add them too. Remember, eyebrows are
full of expression, so have fun with it! :)

7. After all the colors have tried, you can add varnish. Varnish is
really important to preserving the faceup, so please don't skip this
one. Just paint over everything you've painted. I recommend a shine
varnish so your dolls eyes and lips will have a subtle shine.
Tadaa! Now take pics and show off your doll to all your friends. :)
If you complete a head with this tutorial, please post a picture Here!
No comments:
Post a Comment